Customization
All customization options are found under ProfileSwitch → Design and ProfileSwitch → Avatars in your WordPress admin.
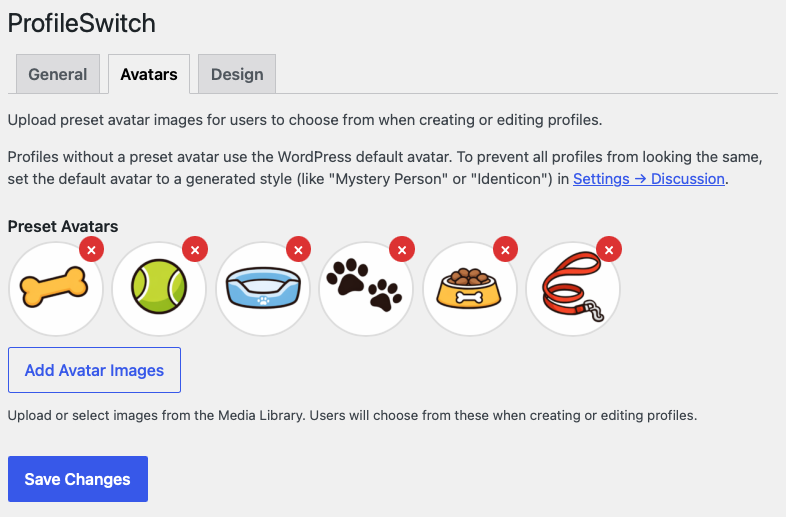
Preset avatars
Go to ProfileSwitch → Avatars and click “Add Avatars” to upload images from your media library. These avatars appear as options when users create or edit a profile.
You can reorder or remove avatars at any time. If a user has selected an avatar that you later remove, they’ll see the default avatar until they pick a new one.
Tip: Square images work best. We recommend at least 200x200px.
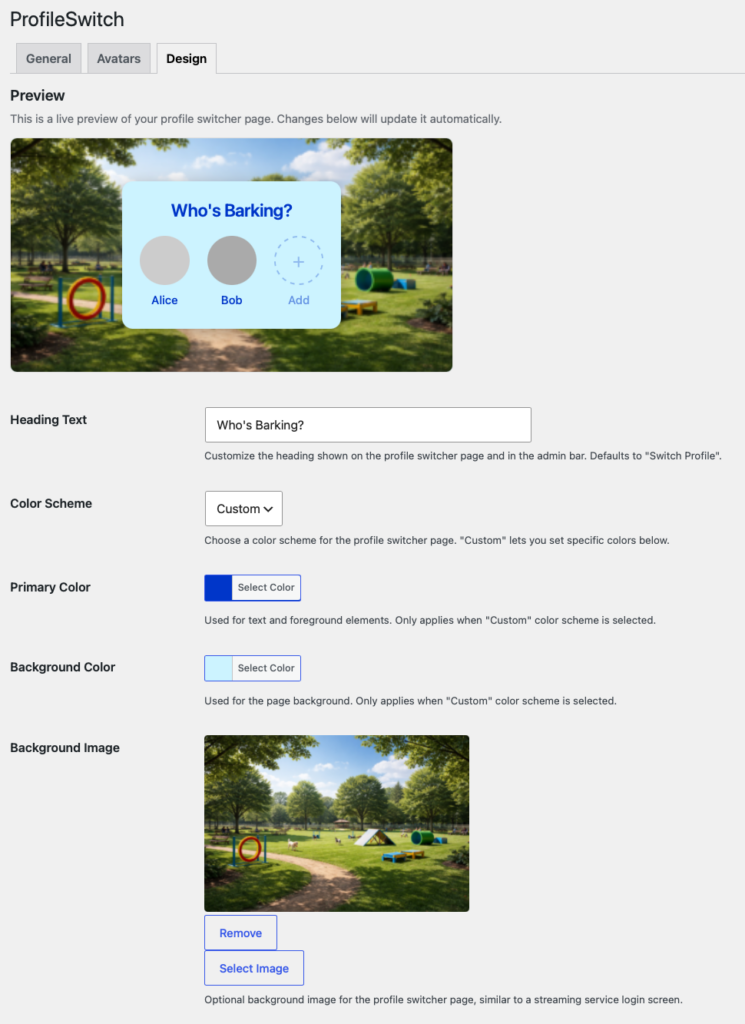
Color scheme
Under ProfileSwitch → Design, choose from three color schemes:
- Light — White background with dark text. The default.
- Dark — Dark background with light text.
- Custom — Set your own primary (text) and background colors using the color pickers that appear.
Background
The Background Type dropdown gives you three options:
- None — Solid color background only (from your color scheme).
- Image — Upload a background image from your media library. It displays full-screen behind the profile switcher.
- Website Blur — Renders your homepage in a non-interactive iframe behind the switcher with a frosted glass effect. This gives visual context about which site the user is on.
Custom heading
The Heading Text field lets you change the text shown at the top of the profile switcher page. Leave it blank to use the default: “Select Profile”.
Live preview
The Design settings tab includes a live preview that updates as you change settings. This lets you see exactly how the profile switcher will look before saving.